Tuesday, April 30, 2013

Barbie Month .22 - 5 row hat, 5 ways


Welcome to the last pattern in Barbie month. I hope everyone has had fun following along, and made some super fun and cute items for Barbie and Ken.
Rest assured, this will not be the last Barbie related pattern from me. Oh I have a whole whiteboard full of ideas, so you can expect to see some more about the place in the future. I have had a lot of fun getting these designed, photographed and blogged for you, its been a fun month indeed!

You will need:
3mm hook
dk weight yarn in main and contrasting colours

1. ch3, dc 8 times in the first ch, join
2. ch2, dc in the same stitch, 2dc in each stitch around, including the joining stitch form 1st round, join (18)
3. ch2, dc in each stitch around, join.
4. ch2, hdc in each stitch around, join
5. ch3, dc twice in each stitch around, front loop only.

Basic hat complete.

Variations:


Single stripe hat
Complete as normal but do round 4 in a contrasting colour.
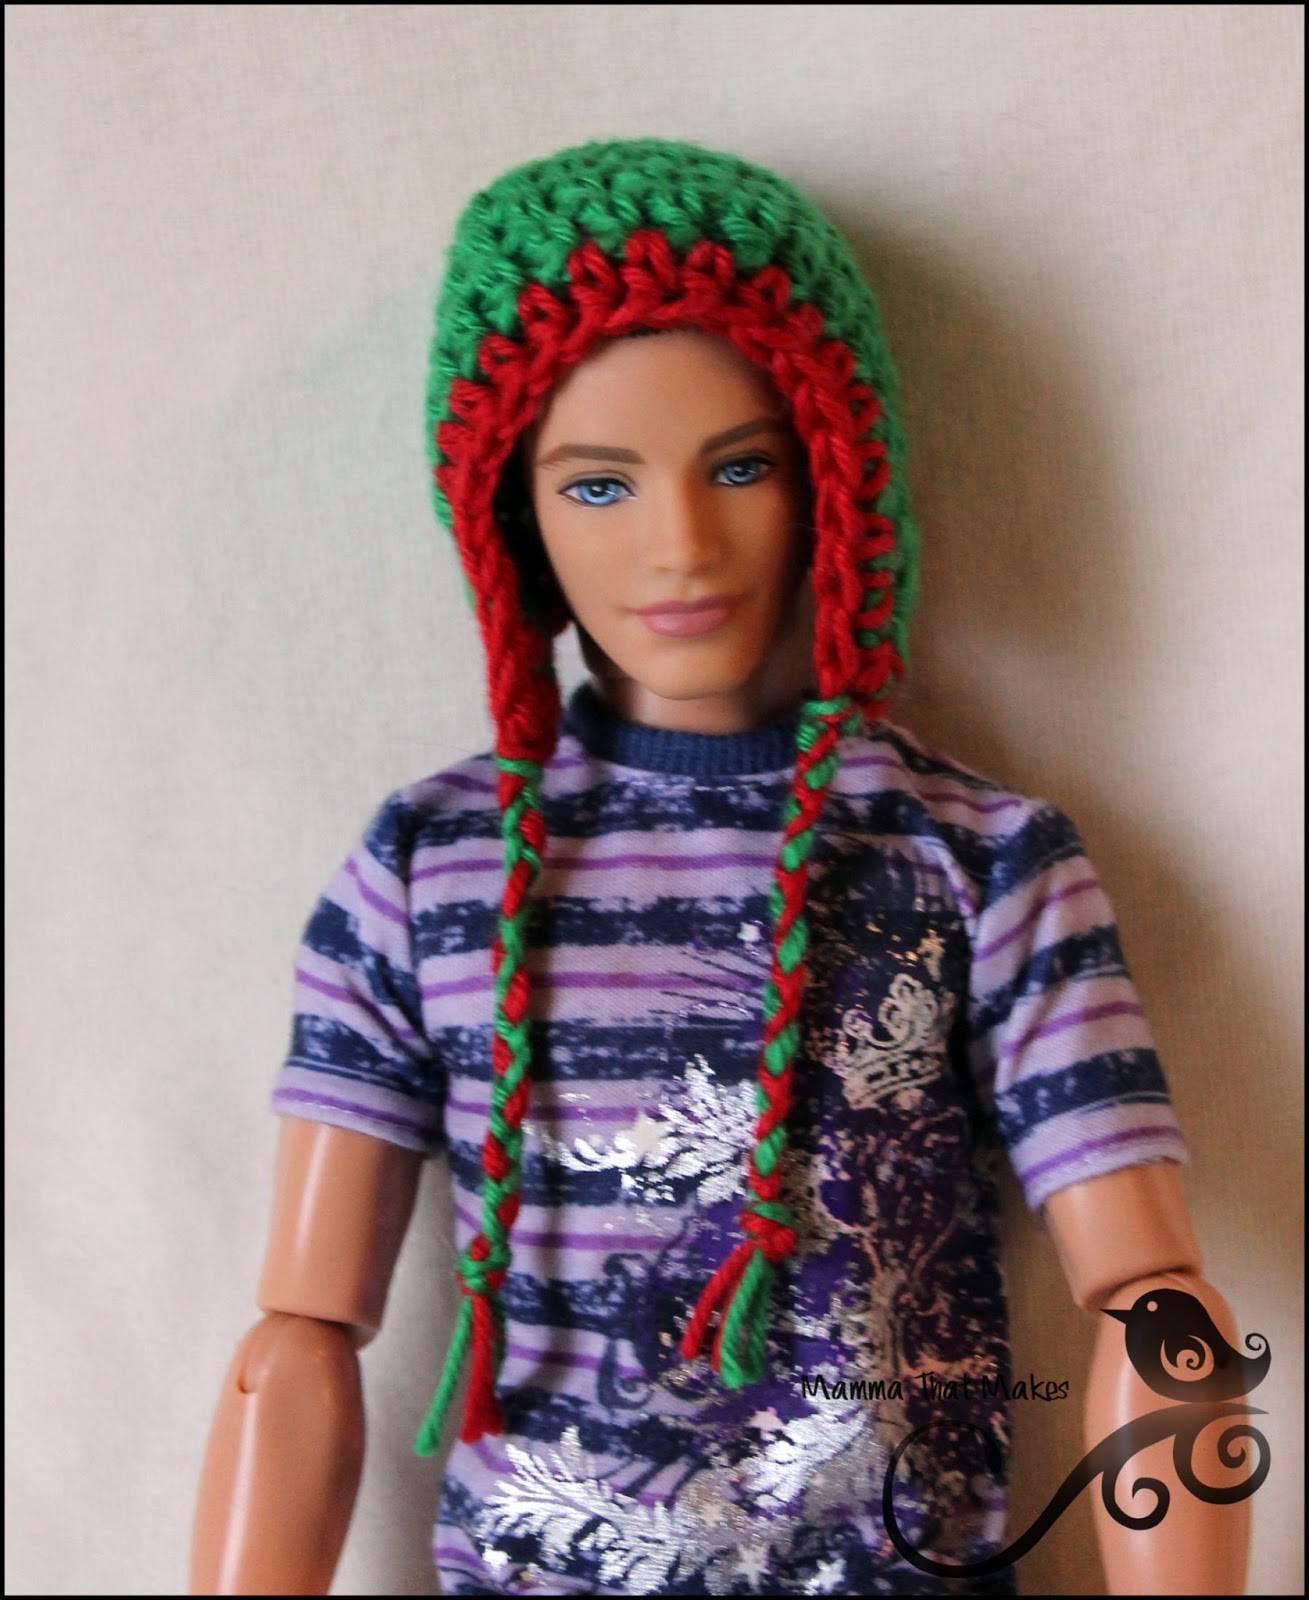


2 Toned
Complete main hat as normal and use a contrasting colour for the brim.


Flower
In a contrasting colour, ch2, hdc 5 times in the 1st stitch, join. In each st around *ch1, hdc, sl st*, sl st to the next and repeat. Sew onto hat.


Striped.
Using main colour (A) and contrasting (B)
Rounds 1, 3 and 5 in colour A and 2 and 4 in B

Monday, April 29, 2013

Barbie Month .21 - Apron


Well peeps, here is the second last pattern, its been quite a month hey!

Miss 10 requested an apron for Barbie, so she can look like mummy does when she bakes. So here is Barbie's apron. Its quite simple, but adds a lovely touch over a dress to make Barbie into a baker :)


You will need:
2.5mm hook
Crochet thread

1. ch12, sc in the 2nd chain from hook and each across
2. ch2, turn, hdc across
3-5. Repeat round 2
6. sc in the first 2 stitches, hdc, dc in the next 2 stitches, 3tr in the next stitch, dc in the next 2 stitches, hdc, sc in the last 2 stitches.

End off yarn and re-join in top left corner.
Ch2, hdc evenly around the entire apron, join (remembering to do 2-3 stitches in the corners to keep them from pulling in.)
ch24, hdc in the second chain from hook and each ch across, when you get to the end of chains hdc in each stitch across the top, when you get to the end ch24, turn, hdc in the second chain from hook and each back to the apron, join.

Sunday, April 28, 2013

Barbie Month .20 Ken's Overalls


Good morning beautiful people!

So close to the end now, Ive had such fun working up all these patterns, and my kids have been very excited with the new clothing.

Today's pattern was a suggestion from Lisa at crochet quackers and I have to say, Im so thrilled with it. Yup, good Ol' Ken has gone country with his very own denim look overalls! I think they are super cute, and my girls love the idea of Farmer Ken taking care of all their toy animals!


You will need:

4ply yarn (fingering weight) I've used Moda Vera Birdsnest
3.5mm hook
2 small buttons

1. ch22, sl st to join.
2. hdc in each stitch around, join.
3-6. Repeat round 2
First Leg 
7. ch2, hdc in the first 11 stitches, skip the rest and join to the 1st stitch to make a leg hole.
8+ Place marker and hdc in continual rounds until leg is the length of your dolls leg. Once it is the right length sl st to the next stitch.
ch1. sc in each stitch around, join.
Repeat twice more.
Finish off and weave in ends. Turn the sc rows up to make a cuff.

Second Leg
Join yarn to any unworked stitch from round 6 and repeat instructions from round 7 on.

Adding the bib.
1. Lay pants flat and find the front 11 stitches. Join yarn to the front right and sc across 11
2. ch1, turn, sc across
3. Repeat row 2
4. ch1, turn, sc2tg, sc in the next 7 stitches, sc2tg
5. ch1, turn, sc in each stitch across
6. ch1, turn, sc2tg, sc in the next 5 stitches, sc2tg
7. ch1, turn, sc across
8. ch1, turn, sc2tg twice, sc, sc2tg
end off, weave in the ends.

Adding the Straps
1. Turn the pants around so the bib side is face down. Find the centre 3 stitches in the back. Join to the 1st of 3 (on the right side) sc in the same stitch and the next 2
2. ch1, turn, sc across (3sc)
3-5. Repeat row 2
6. ch1, turn, 2sc in each stitch across (6)
7. ch1, turn sc across
8. Repeat row 7.
9. ch1, turn, sc 3 (starting one strap)
10-16. Repeat row 9.
End off.

Join yarn to one of the unworked edge stitches from row 8 and repeat  from row 9 down to create the second strap.

Add the buttons to the front of the bib.

Thats it guys, overalls are done :) Hope you enjoy making them.

Saturday, April 27, 2013

Barbie Month .19 - A beanie for Ken


Hi howdy hi!

Today I have a simple little pattern for you. A neat little ear flap beanie for ken, complete with ties! Now my Ken has fairly short hair, so if you want to make this beanie for a Ken with more hair, or a Barbie with a LOT of hair, then you may have to do a few extra rounds before you add the ear flaps and final round. test it on the doll to see how it's looking.


You will need:
2mm hook
3ply (light fingering) yarn.


1. ch2, sc 7 times in the first st, join
2. ch2, hdc in the same stitch, 2hdc in each remaining stitch, join
3. ch2, hdc in the same stitch, *hdc, 2hdc in the next stitch* repeat around, join
4. ch2, hdc in the same stitch, *hdc in the next 2 stitches, 2hdc in the next stitch* Repeat around, join
5. ch2, hdc in each stitch around, join
6. sl st in the first 5 stitches, in the same stitch as the last sl st do a dc, dc in the next 3 stitches
7. ch2, turn, dc2tg twice
8. ch1, turn, sc2tg, finish off, weave in ends.

9. From the centre back count to the right 8 stitches, join yarn to the 8th stitch, ch1, dc in the same stitch as joining, dc in the next 3 stitches
10. ch2, turn, dc2tg twice
11. ch1, turn, sc2tg
Finish odd and weave in ends.

Join contrasting colour to centre back and hdc around the entire hat

Ties: Refer to THIS tutorial if you need help adding ties.
I used one length of each colour to keep it thin.

Friday, April 26, 2013

Barbie Month .18 - Hoodie


Today I have a pattern that is a little more complex, but it is totally worth the effort because this sweet hoodie looks fantastic on Barbie!


Instructions in (brackets) are to be completed in the same stitch.
thin 4ply yarn, bordering on 3ply. Check for fit after the first few rows
2.5mm hook

Chain 32
1. ch2, into 2nd chain from hook hdc, hdc in the next 5, (hdc, c1, hdc), hdc in the next 4, (hdc, ch1, hdc), hdc in the next 8 (hdc, ch1, hdc) hdc in the next 4, (hdc, ch1, hdc), hdc to end.

2. ch2, turn, hdc in each hdc, (hdc, ch1, hdc) in each ch1 space from the previous row.

3. ch2, turn, hdc in each stitch to the first ch1 gap, hdc once in the ch1 gap, chain 5, skip all stitches until the next ch1 gap and hdc in it, hdc to the next ch1 gap (hdc in the space), chain 5, skip to the next ch1 gap and hdc in that, hdc in each stitch to end. (this creates the arm holes)

4. ch2, turn, hdc in each stitch across (including the 5 chain stitches)

5. ch2, turn, *hdc in the next 4, hdc2tg*, repeat across.

6. Repeat row 5

7-11. ch2, turn, hdc in each stitch across.

End off.

SLEEVE

1. join contrasting yarn to any stitch on the armhole and hdc evenly around (19 for me)

2-5. ch2, hdc in each stitch around, join.
6. ch2, *hdc in the next 3 stitches, hdc2tg* repeat around, join.
7-14. ch2, hdc in each stitch around, join.
End of yarn and weave in tail.

Repeat 1-14 for the other arm hole.

Join yarn to the bottom corner of the jacket and hdc evenly around the entire thing.

HOOD

1. ch40 leaving long starting tail for sewing, hdc in the second chain and each chain across.
2-5. ch2, turn, hdc in each stitch across, join.
6. hdc in the next 17 stitches, hdc2tg 3 times, hdc in the last 16 stitches.
7. ch2, turn, hdc across.
8. ch2, turn, hdc in the first 14 stitches, hdc2tg 4 times, hdc in the last 14 stitches.

Fold the hood in half and sc it together
end off

sew bottom of hood to collar of jacket


sew on 3 buttons

Thursday, April 25, 2013

Barbie Month .17 - Kens Dress Jacket


Hello hello!
As promised yesterday, here is Ken's jacket. Its pretty simple to work up, and looks fantastic on!


You will need:

dk weight (8ply) yarn
small amount of flower colour in 3 or 4ply
3.75mm hook
2.5mm hook

With Dk weight yarn and 3.75mm hook.

Jacket Back


1. ch13, hdc in the 2nd chain from hook and each chain across (12)
2. ch2, turn, hdc across
3. repeat row 2
4. ch2, turn, hdc in the first 5 stitches, hdc2tg, hdc in the last 5 stitches
5. ch2, turn, hdc in each stitch across
6. ch2, turn, hdc in the first 3 stitches , hdc2tg, hdc, hdc2tg, hdc in the last 3 stitches
7-10. ch2, turn, hdc in each stitch across
Finish off, weave in end.

Front side of jacket


1. With the top of  the jacket facing up, join to the top right with a sl, hdc in the same stitch, hdc next 2 stitches
2. ch2, turn, hdc in all 3 stitches
4-5. ch2, turn, hdc across
6. ch2, turn, 2hdc in the first stitch, hdc in the last 2 stitches
7. ch2, turn, 2hdc in the first stitch, hdc in the next 2 stitches, 2hdc in the last stitch
8. ch2, turn, hdc in the first 5 stitches, 2hdc in the last stitch
9-13. ch2, turn, hdc in each stitch across
Finish off and weave in end.

To make the second side:

Turn piece so the remaining corner is now the top right and repeat 1-13 of front side of jacket.

Fold the front panels over and sew up both side seams, from the bottom row up to row 7, leaving the rest unworked for the armholes
Repeat for the other side.

Armholes
1. join the yarn with a sl st to any stitch in the armhole and evenly sc around it 12 times.
2-7. ch2, sc around, join.

Collar

1. (with front of jacket facing you) From the bottom right corner of the jacket count up 7 rows, join your yarn on the inside edge of the jacket and sc 18 stitches up and around the neck and down the side evenly.
2. ch1, turn, sc around front loops only

3. ch1, turn, sc 2, hdc 2, 2hdc in each of the next 2 stitches, dc, 2dc in each of the next next 4 stitches, dc, 2hdc in each of the next 2 stitches, hdc 2,  sc 2, sc evenly down to the bottom corner of the jacket, 2sc in the corner, sc across to next corner, 2sc in the corner, then sc up to where you started the collar and sl st to it

Flower:
Contrasting colour and 2.5mm hook
ch2, sc 4 times into the 1st chain, join.

Sew onto breast of jacket.
Sew small button onto the bottom of jacket.


Wednesday, April 24, 2013

Barbie Month .16 - Kens Dress Pants


Welcome to day 16! We're getting closer and closer now to the end of the month.

Miss 8 asked me the other day if I would make some clothing for Ken doll. Because she decided "Ken can NOT get married in shorts and a flowery shirt mum!" The flowery shirt in question was a Hawaiian one, and I  have to agree with her, beside Barbie in her elegant gowns, the shorts just don't cut it! So I set about putting together a suit for Ken so he could arrive to the Barbie wedding in style! Today we'll make the pants, tomorrow his jacket.

You will need:


You will need:
1 rubber band that fits Kens waist
dk weight (8ply) yarn
3.75mm hook

1. sc 26 times around the band, join.
2. ch1, sc in each stitch around, join
3-5. ch1, sc in each stitch around, join.
6. ch1, sc in the next 13 stitches, skip all the rest and join to the 1st stitch. Leg hole made.
7+. sc in continual rounds until pant leg is desired length. Mine are 5.5 inches from crotch to hem.

Join yarn to an unworked stitch from round 5 and repeat 6-7+ to make the second leg.

Tuesday, April 23, 2013

Barbie Month .15 - Barbie Fairy Wings


Hello and good morning!
Hope everyone is following along still. Only a few days left now!

Today's pattern was created by request from a good friend of mine, Edward, who runs Confessions Of Crafty Witches. A pair of wings for dolls, that can be either sewn directly onto a garment (back of a Barbie dress = instant Fairy) or can be slid over the arms to turn any doll of similar size into a fairy.


The design itself comes from ideas from Miss 9 who has a love for the butterfly fairies movie, so we tried making them a cross between butterflies and fairies.

You will need:
3.75mm hook
4ply (fingering weight) yarn

tr = triple crochet
picot = http://www.dummies.com/how-to/content/how-to-crochet-a-picot-stitch.html


1. ch3, sc in 1st chain 4 times, join
2. ch7, sc into the first stitch, ch7, sc into the second stitch, ch12, sc into the third stitch, ch12, sc into the fourth stitch
3. Into the first ch7 gap, (hdc 4, ch3, hdc), sl st into the sc, (hdc 4, ch3, hdc 4) into the next ch7 gap, sl st into the next sc, in the ch12 gap (hdc2, dc3, picot, dc, picot, tc, picot, tr, ch3, sl to chain, sc6) , skip the next sc and into the last ch12 gap, (sc6, ch3, tr, pic, tc, pic, dc, pic, dc3, hd2,) join to sc.

Finish off and weave in ends.

If you wish to sew the wings directly onto something you won't need the following step. Otherwise:

Strap for arms.
ch20, sl st to the first chain, ch20, sl st back into the first chain. End off. Sew the middle of the straps to the back of the wings.

Monday, April 22, 2013

Barbie Month .14 - Ball Gown V2


Well here we are at the end of week 2! I hope you have enjoyed all the patterns so far. I know my girls sure have! Today I have another fancy gown with some flair. It has a longer back and a fluffy bottom. My girls just love this one!

You will need:
3.75mm hook
dk weight yarn in main colour
small amount of fun fur/ fuzzy fibre
1 rubber band
Optional: 5 beads.

1. Join yarn with a sl st to the band and sc 20 times around the band, join.
2. ch2, hdc in each stitch around, join
3. ch2, *hdc in the next 3 stitches, hdc2tg*
4. ch2, hdc in each stich around, join.
5. ch2, *hdc 6 times, hdc2tg* Repeat once more, join.
6-7. ch2, hdc around, join.
8-9. ch2, *hdc, 2hdc in the next stitch* repeat around, join.
10-11. ch2, hdc in each stitch around, join.
12, ch1, sc in the first 4 stitches, hdc in the next 6 stitches, dc  in the next 9, hdc  in the next 6 stitches, sc  in the next 6 stitches, join
13. turn, sl st  in the first 6 stitches, dc  in the next 21 stitches, sl st in the last 4 stitches, join
14. turn, ch1, sc in the first 4 stitches, dc in the next 21 stitches, sc in the last 6 stitches, join
15. turn, ch1, sc in the first 6 stitches, dc in the next 21 stitches, sc in the last 4 stitches, join
16. turn, ch1, sc in the first 4 stitches, hdc in the next 21 stitches, sc in the last 6 stitches, join

Join fun fur, the following rows are held double with your solid yarn
17-19 sc in each stitch around, join.

If you want to, sew on 5 beads to the front of the dress. I added mine to round 7.


Sunday, April 21, 2013

Barbie Month .13 - Ball Gown V1.


Hello beautiful people!

Welcome to day 13. Today's pattern is one that most little girls will ask for more then anything else. A beautiful gown for Barbie. Be it for a ball or a wedding, Barbie definitely needs something elegant to wear.
This gown is simple as simple can be, so even a beginner can whip this up in no time at all and impress and delight children!


You will need:
dk weight (8ply) yarn
fun fur/fun fibre of any kind in a matching colour
4mm hook
rubber band

1. Join the yarn to the band with a sl st and sc 18 times around the band, join.
2. ch2, hdc around, join
3. ch2, *hdc in the next stitch, hdc2tg* Repeat around, join.
4-5. ch2, hdc around, join.
6. ch2, *hdc, 2hdc in the next stitch*, Repeat around.
7. Repeat round 6.
8. ch2, hdc around
9. Repeat round 6.
10-19. ch2, hdc in each stitch around, join.
End off the main colour and join fun fibre
20. ch2, hdc in each stitch around.
21. Repeat round 20.

Like usual, this would look great in all sorts of colours, with matching OR contrasting trim!


Saturday, April 20, 2013

Barbie Month .12 - Denim Skirt


Hello again beautiful people!
Well here we are onto day 12, and we have a cute and easy denim style skirt for you today. Again, this is a rubber band item, for ease of use and fit. It features a fun little ruffle.

You will need:
4ply (fingering weight) yarn. I use Moda Vera Birds Nest
1 rubber band that fits snug on your dolls waist
3.75mm hook

Note: trc = triple crochet

1. Join yarn to band with a sl st and sc 25 times around it, join.
2-7. ch2, hdc in each stitch around, join.
8. ch1, sc in each stitch around, back loop only.
9. ch4, trc twice in the same stitch, 3trc in each stitch around. Join.

Thats it :) This skirt looks equally great if you use a contrasting colour for the ruffle.


Friday, April 19, 2013

Barbie Month .11 - Peasant Top


Carrying on from yesterdays peasant top, today we have a nice little peasant top to pair up with a skirt or pants. This top features a bobble edging, giving it a fun carefree look.


You will need:
3.75mm hook
4ply (fingering weight) yarn

1. ch26, in the 3rd chain from hook dc, dc in each stitch across. Join to the top of the first stitch to make a circle.
2. ch2, hdc in the first 4 stitches, ch4, skip 4, hdc in the next 8 stitches, ch4, skip 4, hdc in the last 4, join.
3. ch1, sc in the first 4 stitches, sc 4 times across the ch4 from the previous row, sc in the next 8 stitches, sc 4 times in the next ch4 section, sc in the last 4 stitches, join.
5. ch1, *sc, sc2tg* Repeat around, (you can choose to join and ch1, at the start of each round from here on, or place a stitch marker and sc in continual rounds)
6-11. sc in each stitch around
12, ch2. *Bobble (yo, insert, pull through ((3 on hook)) yo, insert, pull through ((5 on hook)), yo, insert, pull through ((7 on hook), yo, pull through all stitches), ch1, sk1* Repeat around, join. End off and weave in ends.


Thursday, April 18, 2013

Barbie Month .10 - Peasant Dress


Hello again!
Are we all having fun? I know I am!
Today's outfit is a simple dress, named because of its bodice style. This dress looks so good in a solid colour or with 2 (or more!) and in any length! Have some fun with the length and colours. You could create a whole heap of unique looking dresses from this one pattern.

3.75mm hook
4ply yarn (fingering weight) in one or 2 colours.

1. ch26, in the 3rd chain from hook dc, dc in each stitch across. Join to the top of the first stitch to make a circle.
2. ch2, hdc in the first 4 stitches, ch4, skip 4, hdc in the next 8 stitches, ch4, skip 4, hdc in the last 4, join.
3. ch1, sc in the first 4 stitches, sc 4 times across the ch4 from the previous row, sc in the next 8 stitches, sc 4 times in the next ch4 section, sc in the last 4 stitches, join.
5. ch1, *sc, sc2tg* Repeat around, (you can choose to join and ch1, at the start of each round from here on, or place a stitch marker and sc in continual rounds)
6-9. sc in each stitch around
10. *scin the next stitch, 2sc in the next stitch* repeat around
11. sc in each stitch around
12. Repeat round 10.
13. sc in each stitch around.
Continue to sc around until the skirt is the desired length. End off, weave in ends.

To add a belt.
chain 55, sl st in each chain. Tie around dolls waist. If you want to, secure the belt to the dress at the back with a needle and thread, this will stop kids losing the belt.


Wednesday, April 17, 2013

Barbie Month .9 - Dinner Dress


Welcome to day 9!

Today I have a nice little dinner dress for Barbie. Its one of the few designs Ive done so far with sleeves. I tend to avoid sleeves on dresses, mainly because my special needs girl Miss C struggles to get them onto the dolls and it often ends in disaster and tears. Still, I wanted to include a few from Miss L's drawings so here is the first.

The yarn used for this pattern is classed as a 4ply, but it is a very light 4ply, bordering on 3ply (which is what I think it should be classed at), so after the first few rounds check for fit.

2.75mm hook
Light 4ply or 3ply yarn (fingering, light fingering) yarn in chosen colour.

1. chain 35, join.
2. ch2, hdc in each stitch around, join.
3. Repeat round 2.
4. ch2, *hdc in the next 3 stitches, hdc2tg* Repeat around, join.
5. ch2, *hdc in the next 2 stitches, hdc2tg*, Repeat around, join.
6. Repeat round 5.
7-9. ch2, hdc in each stitch around, join.
10. ch2, *hdc in the next 2 stitches, 2hdc in the next stitch* Repeat around, join.
11-12. ch2, hdc in each stitch around, join
13. ch2, *hdc in the next 3 stitches, 2hdc in the next stitch*, repeat around, join.
14-21. ch2, hdc in each stitch around, join.
22. ch2, hdc twice in the same stitch, 3hdc in each stitch around, join. End off.

Adding the sleeves.
join yarn with a sl st to centre back.
1. sc in the next 6 stitches, ch9, skip 8, sc in the next 7 stitches, ch9, skip 8, sc in the last 6 stitches, join.
2. sl st in the first 6 sc, hdc 18 times in the first ch9 gap, sl st the next 7, hdc another 18 times in the next ch9 gap, sl st in the last 6, join. End off yarn, weave in ends.


Tuesday, April 16, 2013

Barbie Month .8 - Shorts


Welcome to the start of week 2! This week we'll be kicking off with a fun and simple pair of shorts for Barbie. Very easy and simple to make in all sorts of fun colours!

You will need:
3.75mm hook
a rubber band that sits snug around your dolls waist
Light weight yarn. (thin dk) Im using Moda Vera Alpine Spritz which is listed as a sports weight but feels closer to dk.

1. Join yarn to the band with a sl st, sc 20 times around the band.
2. ch1, sc in each stitch around, join.
3-5. Repeat round 2
6. ch1, sc in the next 10, skip all the rest and join to the first sc. Leg made.
7. ch1, sc around the leg, join End off.
8. Join the yarn on an unworked stitch from round 5, sc 10, join. Second leg hole complete.
9. ch1, sc around.

This pattern can be easily adjusted to make longer shorts, simply sc a few more rows on each leg.


Monday, April 15, 2013

Barbie Month .7 - Basic Midriff Top


Phew, here we are at the end of the first week! How exciting!

Today's pattern wasn't actually intended to be a pattern, but it was asked about on my Facebook page so I thought what the hey. Originally I whipped this little top up so I could cover Barbies boobs up when I was photographing skirts, but everyone seems to like its simplicity so here it is. I promise, this is going to be the fastest piece of Barbie clothing you have ever made!

You will need:
3.5mm hook
fingering (4ply) weight yarn
one rubber band that fits over your dolls bust.

1. Join the yarn to the band with a sl st and sc around it 25 times, join
2. ch2, hdc in each stitch around, join
3. ch2, *hdc in the next 3 stitches, hdc2tg* Repeat around, join.
4. ch2, *hdc in the next 2 stitches, hdc2tg* Repeat around, join.
5-6 sc in each stitch around, join.

To extend, just add a few more rows of sc.


Sunday, April 14, 2013

Barbie Month .6 - Ruffly Hem Skirt


Welcome peeps to pattern number 6!

Another skirt today, this one has a bit mote flair and a fun ruffly edge.

You will need:
3.75mm hook
fingering weight (4ply) yarn in main and contrasting colours
a rubber band that fits around your dolls waist

1. Join yarn with a sl st to the band, sc 24 times around the band, join.
2. ch2, hdc around, join.
3. *hdc twice, 2hdc in the next stitch* Repeat around, join.
4-8. Hdc in each stitch around, join.
9. ch1, sc in each stitch around, join. End colour, weave in ends.
Join contrasting colour
sc in each stitch around
*sc, ch3* Repeat around, join.
End off contrasting colour and weave in ends.

Skirt is done!


Saturday, April 13, 2013

Barbie Month .5 - 2 layers of ruffles


Day 5! Welcome!

Hope everyone is keeping up so far and enjoying the new patterns.
Today we have a little skirt that has some simple ruffles. Super cute and pairs well with most tops.

You will need:
4ply (fingering yarn) in main and contrasting colours
1 rubber band that snugs your dolls waist
3.75mm hook.

1. Join yarn to the band with a sl st, sc 24 arounf the band, join.
2-5. ch1, sc in each stitch around, join.
6. ch2, dc back loop only in each stitch around (this creates a ridge to add the ruffles too), join.
7. ch1, sc in each stitch around, join
8 and 9, repeat rounds 6 and 7
10, ch1, sc in each stitch around. Finish and weave in ends.

Join contrasting colour to a front loop left from round 6 with a sl st, ch2, hdc in the same stitch, then 2hdc in each front loop around, join, end off.

Repeat on the front loops from round 8.

Skirt is complete :)

Friday, April 12, 2013

Barbie Month .4 - Strapped Top


Welcome back,

Day 4 brings us a lovely little strapped top. This one does not use a rubber band, however if you do like to do that, by all means go for it.

You will need:
dk weight (8ply) yarn
3.5mm hook

1. Chain 27, join.
2. sc in each stitch around, join.
3. Repeat round 2
4. *sc in the next 3 stitches, sc2tg* Repeat around, sc in the last 4 stitches, join
5. sc in each stitch around, join
6. Repeat round 4
7. *sc in the next 2 stitches, sc2tg* Repeat around, join
8-10 sc in each stitch around, join
11. Repeat round 7
12+ sc in each stitch around until desired length. (I did 5 rows)
end off and weave in ends

Straps, make 2
leaving a long tail for sewing, chain 11, sc in the second chain and each across (10) ch1, turn, sl st across, leaving a long tail for sewing.

Position your straps where you want them and sew to edge of top.

Your top is done!


This top works equally well as a strapless.

Thursday, April 11, 2013

Barbie Month .3 - Bloomers


Hello hello!

Day 3, and the pattern today is for a pair of ruffled bottom bloomers! Ahh so cute, and very easy to make too!

You will need:
dk weight (8ply) yarn in main and contrasting colour
a rubber band that fits snug around your dolls waist
3.75mm hook

1. Join yarn to rubber band with a sl st, sc 20 times around the band, join.
2. sc in each stitch around, join
3. *sc, 2sc in the next stitch* Repeat around, join.
4-6. sc in each stitch around, join.
First leg.
7. sc 15, skip all the rest of the stitches, and join to the first stitch, this creates one leg hole.
8+ sc in each stitch around until your leg piece measures 3 inches long, then end off.

Join the yarn to an unworked stitch from round 6, sc in the next 15 stitches (that should be all remaining stitches from round 6) and then join to your first stitch from this round, that creates your second leg hole.
Like the first, sc in each stitch around until your leg is the same length as the first one. End off.

Join your contrasting yarn to the end of a leg hole with a sl st. ch3, dc twice in the same stitch, then 3dc in each stitch around, join.

Repeat for second leg hole.

Your bloomers are done! YAY!


Wednesday, April 10, 2013

Barbie Month .2 - Basic Ruffled Bottom Skirt


Welcome to day 2!

Today's pattern is a take on yesterdays, with some changes and a new hemline.

You will need:
1 rubber band that fits snug around your dolls waist
4 ply (fingering yarn) in a main and contrasting colour
3.75mm hook

1. sl st to join the yarn to the rubber band, sc 24 times around the rubber band. Join.
2-4. ch1, sc in each stitch around, join.
5-9. ch2, hdc in each stitch around, join
End main colour and join contrasting.
10. ch3, dc twice in the same stitch, 3dc in each stitch around, join.

Skirt complete! Well done. This is a simple pattern that looks great with contrasting colours, and would also look fantastic in stripes.


Tuesday, April 9, 2013

Barbie Month 1 - Basic Skirt


Hello everyone and welcome to the first post for Barbie month!

Incase you missed my previous post, all this month Ill be sharing patterns I have designed based on drawings from Miss L.

Some will use the rubber band method (If you have used some of my barbie patterns before, you would be familiar with this) and some do not. There will be a lot of great items to make for Barbie, and any little one (or big one too!) will have a blast playing with them. I hope you enjoy these patterns. Don't forget, they will all be on my RAVELRY page too, so feel free to share photos there. I love seeing what you guys make!


Wardrobe Item No.1 - Basic Skirt

A staple for any Barbie wardrobe is the basic skirt. Super simple to make and can be done in under 30 minutes. This skirt uses the rubber band waist method, where you crochet the first round AROUND the rubber band.

You will need:
1 rubber band that fits snug around your dolls waist.
4ply (fingering weight) yarn in main colour, and a small amount of the same in a contrasting colour.
3.75mm hook

1. Join the yarn to the rubber band with a sl st. sc around the rubber band 24 times, join.
2-10. sc in each stitch around, join
End of main colour and join contrasting colour with a sl st.
11. sc in each stitch around. Finish off and weave in all ends.

Skirt is complete. Of course it is very easy to alter the length of the skirt to your own choosing. This pattern is a great starting point for making your own Barbie wardrobe.